These caramel bonfire cupcakes are simple to make and perfect for a bonfire night party. Both Flakes and Matchmakers work well as the wood logs. When it comes to making the buttercream make sure you use an orange gel. I find Colour Spash food colouring works well. If you add a liquid colour you will find it makes the buttercream really bitter. For a full tutorial on how to make them, click here for my bonfire cupcake recipe

Over the last few weeks I have been making an effort to improve my blog photography. It was as a result of some fantastic blogging courses such as River Cottage Blog Camp and Blog On Win. I was also spurred on to make a difference after Wayfair asked me to do a piece for their website. The piece in question is these bonfire cupcakes. They are super simple and you can find the full recipe here with some hints and tips to make it even easier.
Like it or not, a lot of readers enjoy the visual side of a blog post and blog photography can be just as important as the writing. If like me you like covering food, then it is even more important. As most of my posts focus on food, I shall focus on what I have learnt about that side of it.
1. You need light. I often work at night where the light in our kitchen is awful. I now try to photograph in the day. When the weather is nice I will be outside. When it is raining I will do it in the conservatory. Generally, not using a flash is better.
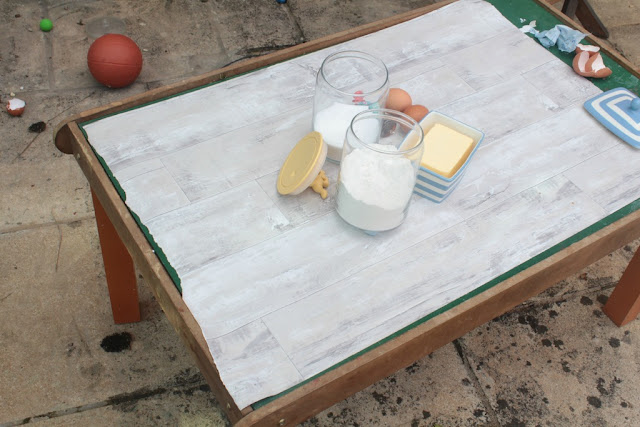
2. You don't need to spend a lot on the backgrounds. You may have noticed a nice white wood block table in my photographs recently. Well it is a nice piece of wood block wallpaper on the boys old train table!
3. A few nice props will make a huge difference. I now have my own blogging cupboard in the kitchen where I store the props that I particularly like. The olive wood chopping board from Wayfair is now a particular favourite of mine and is coming out again and again.

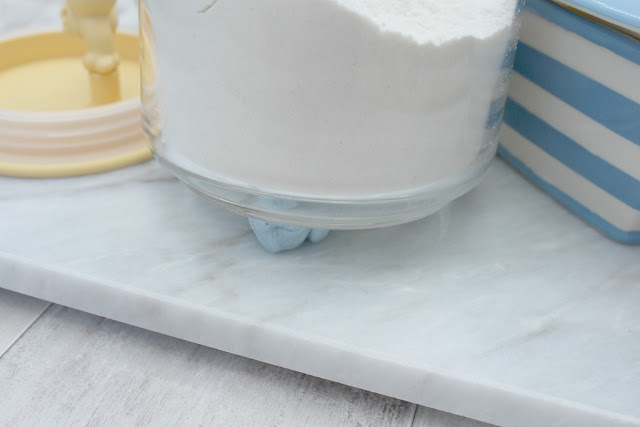
4. When doing a "looking down" shot use blue tack to angle items. This was a tip from the lovely Lucy Heath at Blog Camp River Cottage. It had not even entered my mind of doing such things. When looking down on a glass for instance it looks the wrong shape and a small piece of blue tac can correct this.

5. Photograph food when it is cold. Again not something I had really thought of before. But it is easier to photograph. If you need to melt things do it with a blow torch just before. If you need steam cotton wool dipped in boiling water and hidden behind. There is a whole world of food photography tips that I need to discover!
6. Make sure the right thing is in focus. I am no expert with my DSLR. I love the blurred background you can obtain, but sometimes you find that you have focused in on the wrong thing. This is when you need to check your shots on the computer as it hard to tell on a camera screen. Lucy recommended shooting tethered would help.
7. Don't use shiney cutlery. You will see yourself in it! If using a tarnish cake slice, don't leave it on your nice new wooden chopping board. I learnt the hard way!
8. Once you have a nice shot, you can edit it to make it look as you want. I use PicMonkey but Annie from Fable and Folk recommends Lightroom. I still haven't had time to check it out now though.
So these are my beginners tips. I hope that they are helpful. I have found that my "likes" on instagram are increasing and I am much happier with the photographs on the blog recently. Don't forget to check out my bonfire cupcake recipe if you are having a party this fireworks night.

No comments:
Post a Comment