August 2017

Tuesday, 29 August 2017

Smarties Anti Gravity Cupcakes

These Smarties anti gravity cupcakes are easy to make if you are a fan of illusion cakes. Tonight sees GBBO back on our screens. Hurrah! I hope! I was not happy that channel 4 took over the show and Mary is no longer in it, but I will give it a go and see if I can still love it. Once again I am planning on baking along with some other lovely bloggers and Jenny from Mummy Mishaps will be hosting a weekly linky so you can see what we all get up to.

When it comes to procrastination I am a queen. I am supposed to be packing to go on holiday. Instead I am baking cupcakes. When I saw that illusion cakes was on the list for tonights show, I had to have a quick go.

Smarties Anti Gravity Cupcakes

If you are a regular reader, you will know that I am a fan of anti gravity cakes. Why? They look impressive but are relatively simple to make. One of my favourties is my anti gravity Prosecco cake.

As time is not on my side to do anything too fancy this week, I thought I would make some Smarties anti gravity cupcakes in a hope that is what is meant by an illusion cake. (Sometimes they can be quite cryptic with the challenges so I often bake after the show. This also helps as I get some tips on what to do.)

I made 10 cupcakes using a standard cupcake recipe of 4oz butter, 4oz self raising flour, 4oz caster sugar and 2 eggs.

Smarties Anti Gravity Cupcakes

  • 10 cupcakes
  • 5oz butter
  • 9 oz icing sugar
  • 1oz cocoa powder
  • 10 small paper cake pop sticks
  • 1 bag of Smarties minis
  • a small bar of chocolate
  1. Once your cupcakes have cooled, you need to add chocolate buttercream to the tops. Mix the icing sugar, butter and cocoa powder together with a splash of water. Ice the cakes so that the frosting is flat and level with the top of the cupcake case.
  2. Melt a few squares of chocolate.
  3. Dip the cake pop stick in the chocolate and then in the centre of the cupcake. Add some mini Smarties around the bottom of the base. Gently press smarties into the frosting and when full place in the fridge.
  4. Finally you need to "glue" Smarties up the cake pop stick with some melted chocolate. I used a paintbrush to apply the chocolate. The key is not to rush and to put the cake in the fridge if the Smarties start to slip so that the chocolate sets. It takes one box to do the bottom and then some extra smarties to go up the stick.
  5. Finally add the box to the top of the stick.


Pin it for later:

easy to make smarties anti gravity cupcakes, illusion cakes, pouring cakes


Thursday, 24 August 2017

StikBot Pirate Movie Set Review #Stikbot

There has been excitement in our house this week, as the boys received the StikBot Pirate Movie set to review. Perfect to keep them entertained in the British summer! The set is for aged 4+ and contains everything you need to make a stop animation except a phone or tablet.

StikBot Pirate Movie Set

Inside the box is one StikBot with accessories and 1 sheet of stick on clothes. As it is our first set, we didn't have another StikBot which is a shame. However, to get to grips with the idea of stop animation one is fine. Additional StikBots can be bought at a reasonable price.

The scenery board is double sided and can be used as a beach or cliff scene. The rest of the set can be made by popping out the parts from the foam board. This is simple and the pieces fit together easily and are numbered. Children will need help with this and I found myself doing it for mine.

The StikBot itself is a person with suction cups on its hands and feet. This enables you to move them and hold things. It takes a little bit of practice to get them moving without pulling them off the board. If this happens, having it set so you have ghost image helps as it shows you where the StikBot was in the last shot.

Once we had made the set up, the final thing we needed to do was download the Zing StikBot Studio app. My 9 year old immediately got to grips with how to work it. The app contains voice over recording, sound effects and music. The only thing we can't work out is how to delete a shot. Sometimes my boy was a little snap happy and pressed the photo button before moving his hand out of the way. We found it frustrating that we couldn't delete a frame. (If there is a way and you know, let us know!)

Update: You can delete a frame by going into the movie, moving the highlighter to the frame you want to delete and holding down until the option to delete comes up. Phew! This will be helpful.

filming using StikBot Pirate Movie Set

When it comes to storing the set, simple pieces like the trees and sharks could be easily dismantled. However, after putting it together, I don't want to dismantle the ship and boats so we will have to find a large box for it.

My 7 and particularly my 9 year old like this set. I can see the request for another StikBot coming very soon. It is something they can do together and they love making little films so I can see it being used quite regularly.

Here is a short video showing us putting the set together and our stop animation attempts. Big man's first and last attempts over a day are there and you can already see an improvement.


Have you got any of the StikBot sets? Which would you recommend?


Sunday, 20 August 2017

S'mores Tear 'n' Share Bread

This S'mores style tear and share bread is a new favourite with my boys. I did think that homemade bread stuffed with chocolate spread and marshallows was likely to be a winner with them, and the rate that they gobbled it up said it all really!

I have to admit that the summer holidays has left me short on time and I have been doing far less baking than I would like. My boys love homemade bread and I have been looking at the breadmakers by Panasonic and trying to decide if it is an investment that we should make. My Mother in law used to bake bread daily with her breadmaker. She would put the ingredients in every night, let it do its thing and hey presto, freshly baked bread in the morning. As my boys are getting bigger I can see the attraction of this. especially as they seem to easily get through a loaf of bread a day as it is!

S'Mores Tear 'n' Share Bread

I have always loved the idea of S'mores. Unfortunately being British, I have no idea what Grahams Crackers taste like, so I have stuck to using chocolate and marshmallows only. The next time I visit the United States I am going to have to purchase some crackers to see for myself! My S'mores tear 'n' share bread uses a Chelsea bun recipe. After proving, the dough is rolled out and chocolate spread and marshmallows placed in the middle. Once cooked, chocolate icing, chocolate buttons and marshallows are added to the top. I then used my cooks blowtorch to toast the marshmallows. Whilst I used mini marshmallows, full sized ones would also work well - especially inside the dough.


S'mores Tear 'n' Share Bread

  • 500g strong white flour
  • 7g easy bake yeast
  • 275ml milk
  • 50g butter
  • 1 egg
  • 1tsp salt
  • chocolate spread
  • mini marshmallows
  • 2tbsp icing sugar
  • 1tsp cocoa powder
  1. Heat the milk in a pan and add the butter. Once this has melted allow the mixture to cool.
  2. Mix together the flour, year, egg and salt in a bowl. 
  3. Add the milk mixture and make into a dough. Knead for around 10 mins on a lightly floured surface.
  4. Leave to rise for about 2 hours in a bowl covered with a tea towel.
  5. Knock the air our of the dough and roll into a rectangle.
  6. Pre heat the oven to 180C. 
  7. Spread chocolate spread over the dough and add a few handfuls of mini marshmallows.
  8. Roll this up and cut into equal sized balls (aim for 12 balls)
  9. Grease an 8 inch square tin and add the dough balls.
  10. Bake until golden brown.
  11. Once cooled make up a small amount of chocolate icing. I used 2 tbsp icing sugar combined with a teaspoon of cocoa powder and a little water. Drizzle this over the bread. 
  12. Sprinkle with mini marshmallows and chocolate buttons
  13. Use a blow torch to toast the marshallows

Who would you share this with?

Pin it for later:

This s'mores share 'n' tear bread is filled with chocolate spread and marshmallows and uses a chelsea bun recipe


This is a collaborative post

CookBlogShare

Wednesday, 16 August 2017

Easy To Make Banana Bread - Cooking With Kids

I have to say I am unsure why I don't make this easy to make banana bread more often. There are often old bananas in our house and I really should cut down on waste by making these. Even big man enjoyed them and he claims not to be that keen on bananas. I made these with all 3 boys at once. A recipe for disaster you may think, but they worked together well with the promise of being able to lick the bowl. We divided our mixture in half as big and middle man wanted to make cupcakes and little man a loaf. Personally if you are making the recipe with children, I would spoon it into cupcake cases. It cooks so much quicker and they will have to wait less time to try their baking.

Easy To Make Banana Bread


When it comes to adding raisins it is your choice. I tend to add them, in a hope of putting me off eating it (I'm not a dried fruit fan.) Chocolate chips would also work well in it.

Easy To Make Banana Bread

  • 100g butter
  • 225g self raising flour
  • 50g dark brown sugar
  • 50g caster sugar
  • 100g raisins
  • 2 eggs
  • 2tbsp honey or maple syrup (we used maple syrup as had run out of honey)
  • 3 ripe bananas
  1. Pre heat the oven to 180C
  2. Rub the flour and butter to give it a breadcrumb texture.
  3. Add the sugar, raisins, eggs and honey. Give it a good stir, making sure that you mix all the flout at the bottom of the bowl.
  4. Peel and mash the 3 bananas and then stir into your mixture.
  5. Either spoon into cupcake cases or add to a greased loaf tin.
  6. The time it takes for your banana bread to cook will depend on how you have decided to cook it. The cupcakes will take around 10 minutes. My small loaf pan took around 30 mins. It is best to check with a skewer to see if it comes out clean. 
  7. Allow to cool and then enjoy. 

What do you like baking with the kids?

Pin it for later:

easy to make banana bread recipe - prefect for cooking with kids

Monday, 14 August 2017

10 Tips For Venice With Kids

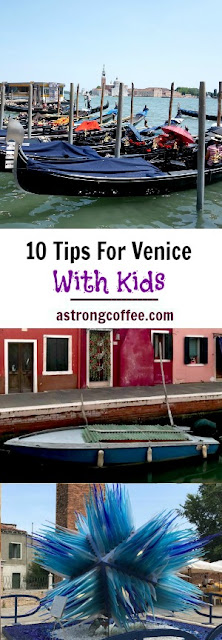
When people asked me where we were going on holiday they all looked slightly amazed. Were we brave or mad? I then explained how we were doing it. By staying just outside with Eurocamp and taking a couple of day trips. Their faces looked less confused. Having been, I thought I would share my wisdom from our stay.

Gondolas in Venice


1. Stay outside Venice in a holiday parc.

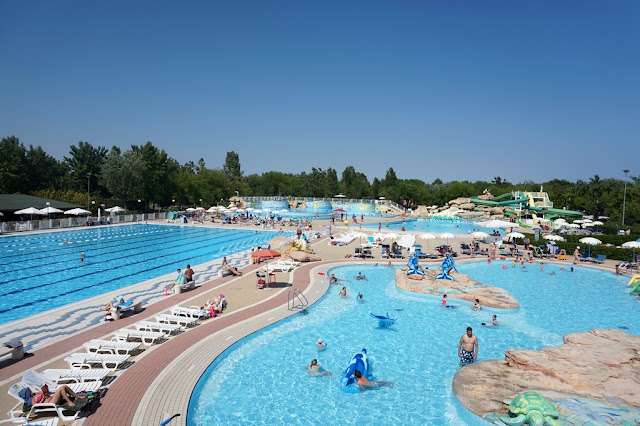
Staying in Venice itself would have been cramped and expensive. Instead we stayed a 40 min boat trip away with Eurocamp at their Marina De Venizia parc. The parc was fantastic for children and our mobile home gave us flexibility with eating. If you are flying direct you are best to hire a car. It had the most amazing swimming pools which we used everyday, What better way to cool off after a trip to Venice! I have no doubt at all that out children will tell you how much they loved Venice, mainly because they had such a good time at this parc.

swimming pools at Marina de venizia


2. Under 6's are free on the boats

We took the boat to Venice from Port Sabbioni. You only need to pay for over 6's. Take water with you as you cant buy food and drink on the boat. There is a toilet but the doors often lock themselves or there is a queue so be warned.

3. Get everyone to use the toilet when you have stopped to eat in a cafe.

Anyone with children will know what it is like. You have just been to a cafe and they didn't need the toilet. You leave and 5 mins later they are desperate. Toilets in Venice aren't cheap! If you think paying 30-50p in London is bad, you will hate Venice. It costs 2 euros per person! One of the attendants took pity on my husband and let him have a euro off when he had to pay a whopping 5 euros to take big and little man to the toilet. If you are in a cafe, make everyone try Before you leave!

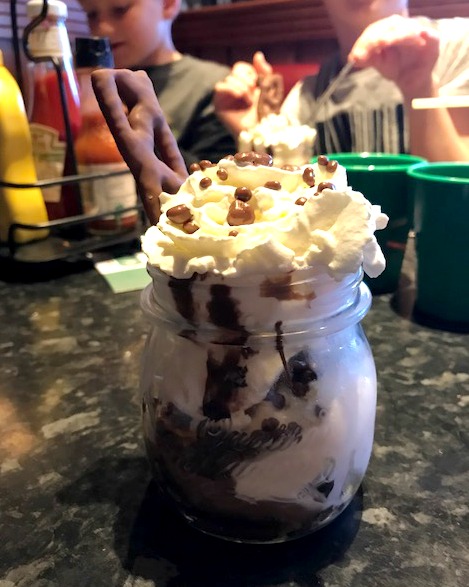
4. Eat gelato on the go!

Walking around a city is never a childs idea of fun. However, if ice cream is involved it is easier. A lot of guide books say to go to the back streets for gelato. We actually went to a place on the corner of St Marks Square. It was cheaper there, as long as you took it away. Want to sit down? You are looking at 15 euros fora sundae!

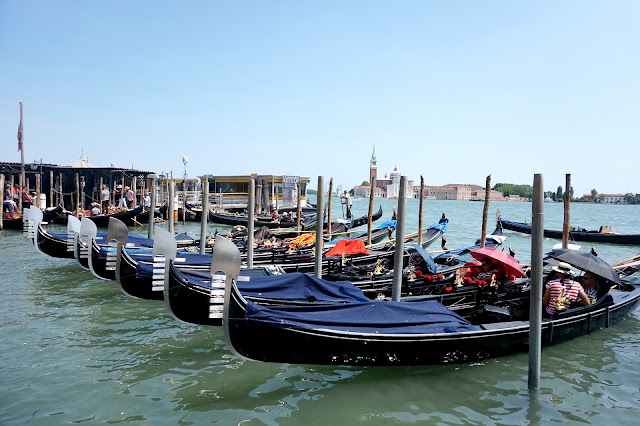
5. Take a gondola before 7pm

Riding a gondola was top of our list of things to do. You can use a vaporetto but this all adds up when there are 5 of you. A gondola is cheapest before 7pm. It will cost 80 euros before 7 and 100 euros after. One advantage of having a family of 5 is that it appears better value as it is a cost per boat and up to 6 can ride for this price.

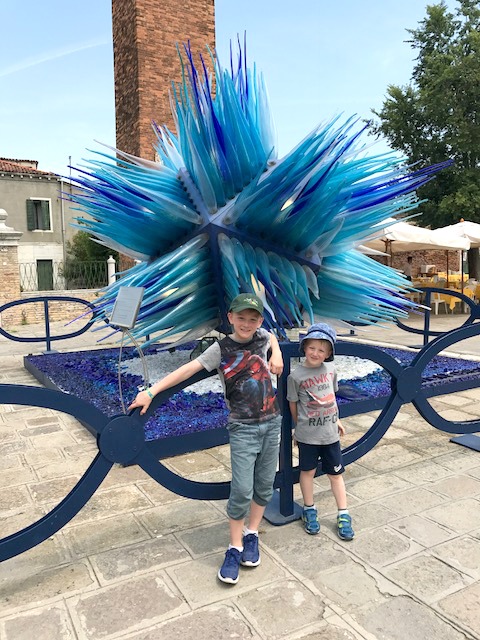
6. Turn left from the boat to see glass blowing in Murano for free.

The boys were mesmerized by the glass blowers. It is fantastic watching them mould a ball of glass with a few tweaks into a horse. If you don't want to pay to watch a glass blowing demonstration then turn left at the boat and you can watch them from the street or inside the shops. You wont be able to take photos or videos and you really should leave a tip. I am sure that the paid trips are really good, but so are the free ones.

island of Murano


7. Visit Murano in the morning.

If you want to see the glass blowing in Murano you need to do it early. They stop doing it at 3pm and also break for lunch. You also need to check that they are running when you visit. We went in June which was fine, but a friend went in August and they were closed.

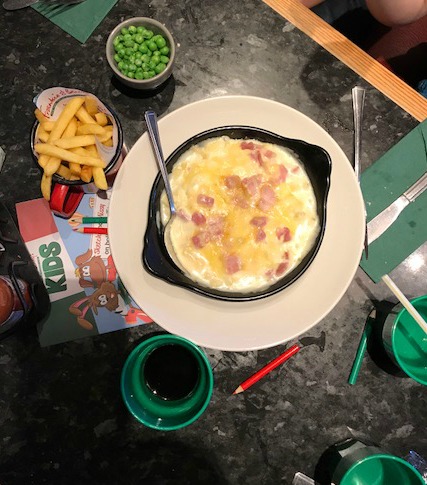
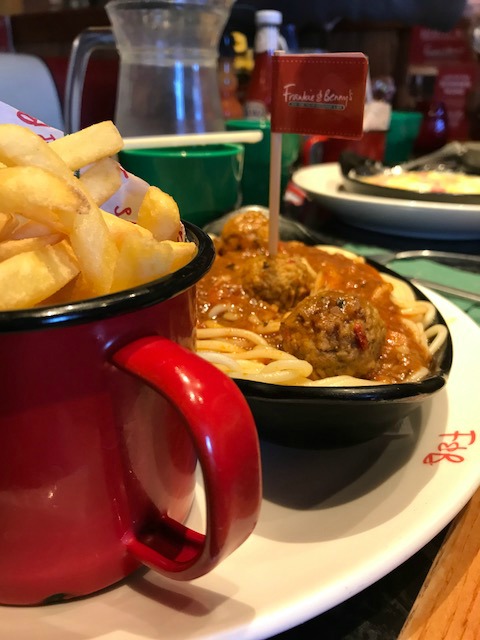
8. Order a couple of pizzas for lunch and share them.

It is ok not to order a pizza each at lunchtime. To be honest the pizzas are huge, so sharing them between the children is fine. No one seemed to mind that we did this. None of the restaurants though understood the concept of tap water. If you ask for water it will be bottled.

9. Beware of pic pockets (but don't overly panic.)

This was a tip from a friend who found herself with no money in Venice when her husband had his wallet pick pocketed. I may have slightly panicked which was not necessary. It is like any busy city, just be careful. Don't take all your money out with you and make sure it is secure. I was overly worried, we were fine, just something to keep in mind.

10.Take drinks and snacks with you.

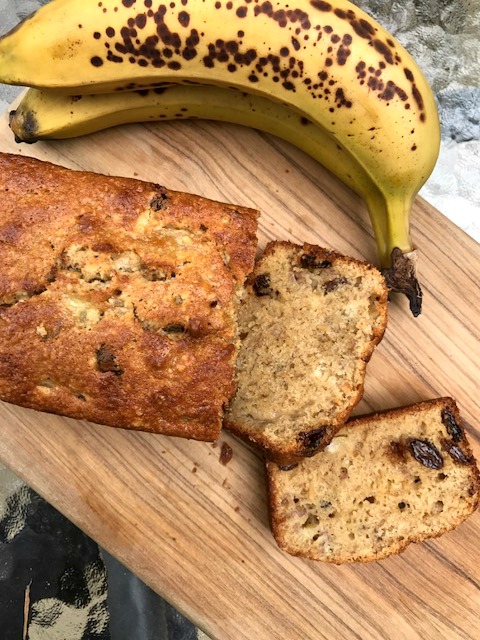
One of the upsides of a self catering holiday is that you will have bought food from a supermarket. My kids are ALWAYS hungry! Pop some drinks and snacks in your bag for your day out so you aren't spending loads of money in cafes. On our trip to the islands we took sandwiches which we ate whilst waiting for our boat. Venice isn't cheap, think London prices as a guide, it can add up if there is a lot of you.


Have you visited Venice and have some good tips to add?

Pin it for later:

My top 10 tips for travelling to Venice with kids in tow


Friday, 11 August 2017

The New Kids Menu At Frankie & Benny's

Last night, we headed to our local Frankie & Benny's to try out their new kids menu. It has been a while since we last ate at Frankie & Benny's and what struck me most was the wide choice on both the kids and adults menu. The children's menu is broken down into smaller and bigger. This is a great idea as my 9 year old often finds that children's meals are on the small side at some chain restaurants. Our meal was complimentary in return for this review, however, if you sign up to the F&B rewards there are lots of offers including kids eat for £1!

Frankie and bennys kids menu

All my boys opted for the bigger menu. The waiter asked if little man wanted the smaller menu but he was adamant he didn't. I guess at nearing 6 he is on the cusp of swapping to the larger meal. The bigger kids meal, consists of a main plus 2 sides, dessert and drink. I was pleased when these were bought out in plastic cups, as they may be big, but they are also clumsy!

Big and middle man both opted for bacon mac and cheese. There is also a choice of two sides. My suggestion of garlic bread was pushed aside for their preferred choice of chips! As you can see the portions were big and I'm pleased to say the sauce was nice and cheesy. There is nothing worse than a mac and cheese tasting bland. No worries of that here.

children's mac and cheese Frankie and Bennys

Little man opted for spaghetti and meatballs (mainly as he liked the picture on the menu I think!) Whilst the meatballs were too peppery for his liking but he gobbled down most of his plate of spaghetti.

kids meatballs frankie and benny's

I was shocked that the boys managed to eat as much as they did. Would they eat dessert? Of course they would! Big man had spied the chocolate fudge sundae when he ordered his main. After confirmation from the waiter that it was a good choice, all three of the boys decided they would give it a go. Their faces lit up at their arrival!

 chocolate fudge sundae frankie and bennys

My husband and I both enjoyed our meals, and again the portion size was large. So large infact we were beaten with the sharing dessert we ordered. This is probably good as I think it may have contained a months worth of sugar!

I felt that the kids menu was good value and liked that you could choose the size of the meal. If you like Italian food with an American twist then Frankie and Benny's fits the bill. To find your nearest Frankie & Benny's click here.


Wednesday, 9 August 2017

Mini Ninja Sushi School With Yo! Sushi

If you are fed up of thinking of things to keep the kids entertained this summer in the pouring rain, then Yo Sushi Mini Ninja Sushi School might be the thing.

Ready for mini ninja sushi school

I am going to hold my hands up at this point and admit that this review was a bit of a risk for me. My children haven't really had sushi before. They tried a bit out of a Sainsbury's snack box once but weren't that impressed. I have never eaten at Yo Sushi myself. I had absolutely no idea if taking them on a sushi making lesson would be good fun, or a big mistake.

I like to try new things with the boys and all of them like cooking. I struggle with this at home as trying to cook with 3 children is hard work. I reassured them that if they didn't like it, I would step in and eat it for them (I'm kind like that!)

making cucumber maki

The mini ninja sushi schools are running on Tuesday and Wednesdays at a number of Yo! Sushi venues. It costs £15 a child and they make 3 dishes, which they get to take home (if they haven't gobbled whilst making them) along with a bag, certificate, recipes and rolling mat.

Everything was well prepared and explained well. They even told you how to make it if you were left or right handed. Rolling was the tricky part and the staff were ready to help.

Mini ninjas require large amounts of concentration! 

The boys started off with cucumber maki. Now I think this looks pretty professional!

cucumber maki

Next up was california sunshine rolls. Middle man would have found this easier to roll if he hadn't been scoffing the cucumber maki he had made!

The last dish they made was salmon nigiri. Once finished the food was packaged up to take home. The class was 45 minutes and there was a wide age range from teenagers down to 5.

Whilst my 5 year old wasn't convinced by all the dishes, my 7 and 9 year old gobbled it down. It certainly goes to show that children will try and eat more if they make their own food! They all really enjoyed the class and middle man is already asking to do another one! He also wants to go back and eat there as he loved the conveyor belt of food going round.

If you are looking for something different to do with the children this summer then mini ninja sushi school is fun and feeds them too!

Tuesday, 1 August 2017

Win An Areopress Coffee Maker And Spiller And Tait Coffee

It will come as no surprise to readers of my blog (and those that haven't from the blog name) that I like coffee. When I started blogging people asked how I coped with three young boys, my answer, a strong coffee. However, joking aside, since having kids it really is how I start my day. I barely function without it! I am a self confessed coffee snob. If I visit a friend and there is a chance they will serve me instant coffee, I opt for tea. I like a rich, smooth ground coffee without a bitter aftertaste. When Spiller and Tait got in touch, I was keen to try their blends.

spiller and tait coffee


Spiller and Tait formed with the vision of helping household recreate their coffee shop experiences at home. They started selling on Amazon and reviews and sales went so well, they are now selling directly from their site. Like me and new to their coffee? Well they have a fantastic offer at the moment where you can get 4 x 250g selection at 50% off!

At the moment we are drinking their signature blend, which is a blend of 5 arabica beans and I can confirm it is really good.

Spiller and Tait have kindly offered a giveaway for one of my readers. And it's a good one! They are offering an areopress and 2 of their 250g bags of ground coffee so that you can try their coffee for yourself. A perfect prize for any coffee lover. All you need to do is to pop over to their site and tell me what blend of theirs you would most like to try. Then complete the gleam entry below. Good Luck!


Win An Areopress And Spiller And Tait Coffee


Listed on  Prizefinder


SuperLucky Blog Giveaway Linky