April 2016

Tuesday, 26 April 2016

London Street Brasserie Lunch Review

london street brasserie


My husband has been telling me for years that he would take me to London Street Brasserie in Reading. Unfortunately with 3 boys and a hectic schedule it is one of those things that you don't get round to. Unless, he is on a business trip and you take your parents when they are down to visit.

Located on the side of the river, a starter and main from the lunch menu costs £16.50 with desserts at £4.95 if you can fit one in. Don't be fooled by my picture, the room was full by 12.30 so I would recommend booking a table.

For my starter I opted for the fried duck egg, toasted brioche, wild mushrooms, crispy smoked bacon and truffle oil. It really was delicious and rather substantial for a starter. 
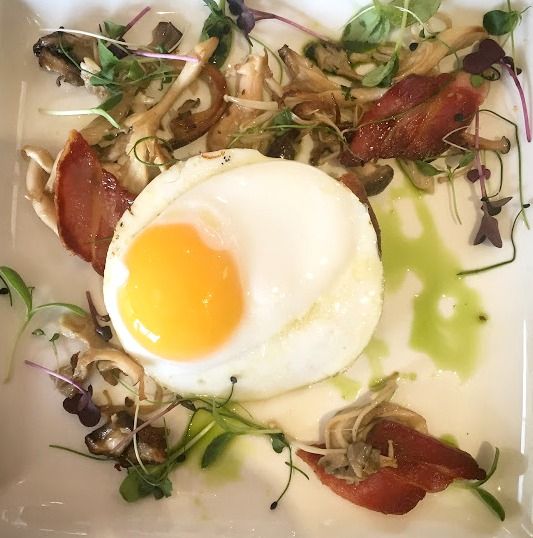
duck egg

For the main we all went for the pan fried sea bream. roasted salsify, wild mushroom and watercress puree. Again we enjoyed this. However, in Masterchef style we agreed that the salsify didn't really bring anything to the dish. 
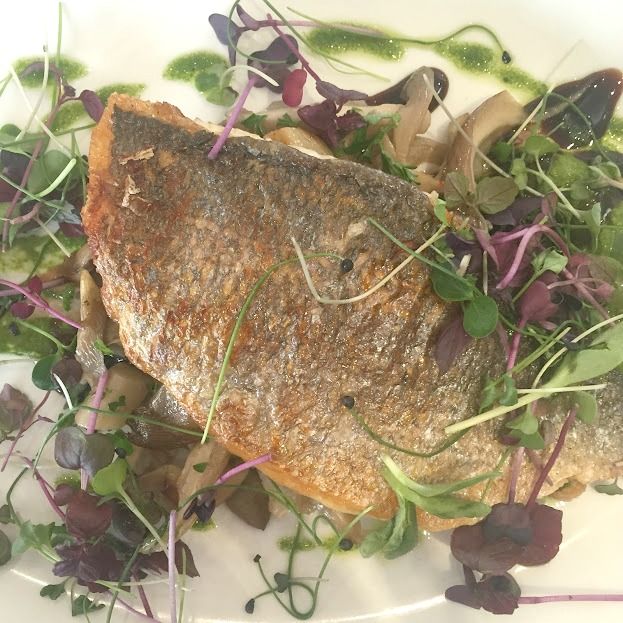
sea bream

One thing worth noting is that the sides are generous so a side of potatoes will easily share two or three people.

Whilst I didn't have room for dessert myself, I did make sure that I had a taste of my Dad's Plum bakewell, with custard sauce and spiced ice cream and it was again lovely.
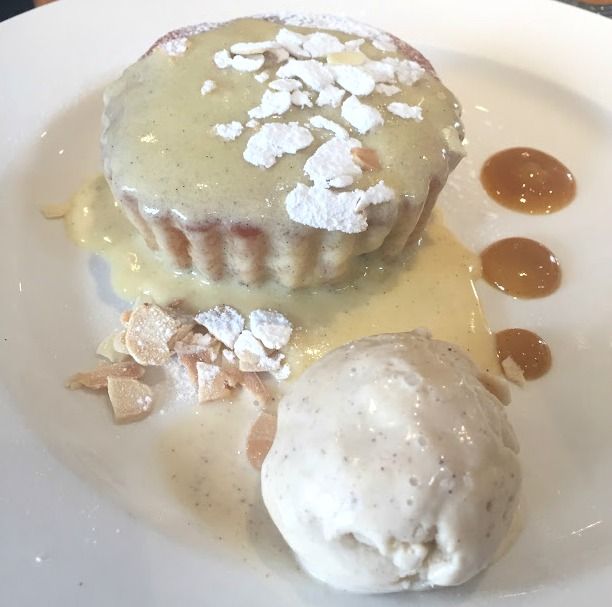
bakewell

It was a lovely meal that I would recommend and now I need to make sure that I go back with my husband. A lovely place to go for a special occasion. 

Thursday, 21 April 2016

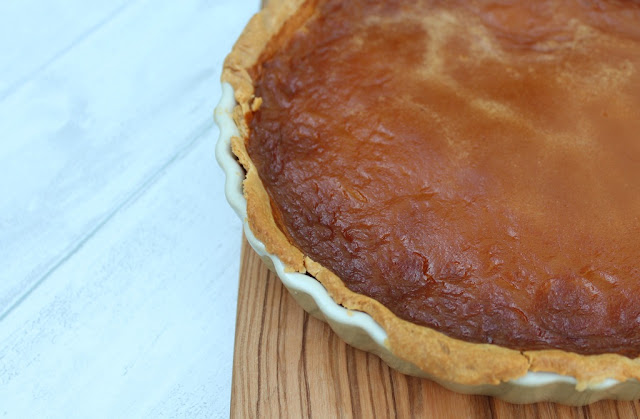
Norfolk Treacle Tart

A couple of years ago we enjoyed a lovely family holiday in Norfolk. The weather was amazing and we enjoyed the beaches, days out and local food. However, it seems I missed out on a foodie treat.

Cottages.com offer self-catering properties around the UK and are challenging food bloggers to create some regional dishes to show that self -catering holidays are a great way to try out the local food. For Norfolk they suggested a Norfolk treacle tart. Oh my it is good! I really should have known about it before holidaying there!

Norfolk tarts

The tart is more of a treacle egg custard rather than the sticky treacle tart that I have eaten in the past. I chose to use a ready rolled block of plain shortcrust pastry as I didn't feel it needed any extra sweetness. The lemon zest really helps balance the sweetness. Let's just say the tart didn't last very long in the house as it was such a big hit.


NORFOLK TREACLE TART
PREP: LESS THAN 20 MINS, COOK: 25-30 MINS

Ingredients
·         6 ounces shortcrust pastry, rich and sweet
·         4 ounces unsalted butter
·         8 tablespoons golden syrup
·         2 eggs, beaten
·         4 tablespoons double cream 
·         2 lemons, zest finely grated

Method
·    Line a shallow 23 cm (9 in) tart tin with the pastry and pre-bake or bake blind.

·    Pre-heat the oven to 200°C (400°F) Gas 6. Put a baking sheet in the oven to pre-heat.

·    Gently warm the butter and syrup together in a pan - just enough for the butter to melt but not letting the mixture get too hot. Remove the pan from the heat and allow the mixture to cool a little.

·     In a bowl, whisk the eggs, cream and lemon zest together. Gradually whisk in the warm butter and syrup mixture, then pour the mixture into the pre-baked pastry case.

·    Place the tart on the baking sheet in the oven and bake for 25 - 30 minutes or until the centre is set.
Norfolk treacle tart


Have you been to Norfolk and tried their treacle tart?


What specialty dishes do you like from around the UK?


This is a commissioned post.

Tuesday, 19 April 2016

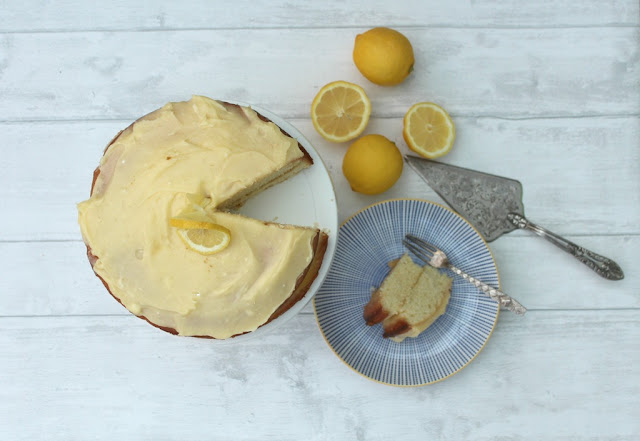
Lemon Cake with Lemon Curd Buttercream

Lemon Cake with Lemon Curd Buttercream

Until recently I would never have thought of House of Fraser as the place to go for baking items. However, after having reviewed a beautiful cake stand they have now kindly sent me some baking accessories. You would think as a food blogger who mainly bakes cakes, I would already have spring form pans. Well I had one rather battered one! I decided to replace it with two from the Linea range and just from baking this cake, I now realise I should have done this years ago! They were reduced to £9 each and are great. Non stick and the spring part just makes it easier to get the cakes out. Having two means I can bake two cakes at the same once therefore saving time and energy!

The turntable is another thing I should have really got around to getting before now too! It makes decorating the cakes so simple and can even be used as a cake stand in itself. I was impressed that the cake didn't slip off as the grip was good.

Lastly I chose some measuring spoons. Another thing I didn't really expect to need. However, the shape of them just makes it easier to use. Usually when I measure using a tablespoon it is hard to tell if the amount is right. This just makes it easy.

Lemon Cake with Lemon Curd Buttercream


Ingredients:

Cake:

8oz butter
8oz self rasing flour
4 eggs
8oz caster sugar
zest of 2 lemons

Lemon syrup:

Juice of 2 lemons
4tbsp caster sugar
2tbsp water

Lemon curd to sandwhich the cakes together

Lemon Butter icing

2tbsp lemon curd
2oz butter
4oz icing sugar
a drop of water.


Pre heat oven to 180C

Mix all the cake ingredients together and divide into the two spring form pans which have been lined with greaseproof paper.

Cook until a skewer come out clean.

Leave in the tins to cool for 10 minutes before pouring over the lemon syrup. To make the syrup, heat the ingredients so that the sugar dissolves and boil for a few minutes.

Allow it to cool slightly before pouring over the sponge cakes.

Sandwich the cakes with some lemon curd

To make the butter icing, mix all the ingredients together and spread on top of the cake.

Enjoy!


Looking for a sugar free lemon cake? Then why no try this recipe.


Linked to cookblogshare

I was sent the items from House of Fraser in return for creating this post.

Sunday, 17 April 2016

My Fear For Little Man Starting School

boy on swing

Tomorrow is the day that we find out if little man has got into our catchment school. As he is in catchment with a sibling I am pretty sure it is a done deal. At least I hope it is as it was the only school we put down. Third time round is very different. When big man was assigned his school it was a different matter. I was worried about the school, about him and me making friends. I don't have these fears with little man.

I know that he will make friends and that it takes a good couple of years for him to be truly settled into a friendship group. He is a happy child that gets on with most people - even if he never remembers their name.

I have no worries about the school as I know it is supportive and they will do the best for my child.

I don't have a worry that he is too young. I was never really sure that the other two were ready for school. Little man certainly is! It is probably because he is the third child and he is wanting to be like his older brothers.

I am not worried that my birds will have all flown the nest. I have been a Mum for nearly 9 years. I have spent 6 of those at home with my boys. Whilst I might feel a bit sad for a day or two, I need to take some time for me. If one more person asks me if I am going back to work I may scream. Of course they are referring to teaching and many don't realise I blog for a living, or that I even have a blog. Either way, I am taking the first few months off to go to the gym before I decide what to do. Realistically with childcare costs and a husband who works away a lot, it will be much the same as it is now.

So all in all I think little man will enjoy school and the challenges and friendship it brings. I do however have one big fear about little man starting school. How the hell am I going to get through Biff, Chip and sodding Kipper with their bloody magic key for a third time?

Please send wine!


Thursday, 14 April 2016

Paw Patrol Magazine Review

paw patrol magazine

I should probably hold my hands up straight away and admit that although middle and little man are keen fans of Paw Patrol, I haven't actually sat down and watched an episode. However, as we have been sent the Paw Patrol magazine to review, I now know a lot more about Chase and his friends!

The magazine came packaged with some plastic gifts. We don't regularly buy magazines, but it is often these plastic gifts that attract the boys to them. Usually they break within seconds of being opened. I was pleasantly surprised by these ones. The torch is just for role play purposes and the dog hat and ears are backed on foam so will be slightly harder wearing. Little man particularly liked the police badge, and whilst it may get broken in the future it has lasted a couple of days of play already.

The magazine has a mix of stories, colouring, stickers and puzzles and is aimed at preschoolers. Whilst middle man who is 6 was also interested in the magazine, the tasks were more suited to little man who is 4.

The stickers as with most magazines were a big hit with little man. I also liked these as they usually involved some bigger task, whether it be solving a maze or counting.

sticker and writing

He also liked the puzzles such as mazes and spot the difference.

There was a making activity, which quite frankly I didn't fancy as it seemed like a lot of cutting and gluing for something that would just get put in the bin. In the middle is a giant pull out poster. One side is a colour wheel and the other the alphabet. We used this to practice little man's letters.

pull out poster

If you would like to see inside the magazine and hear some of little man's thoughts then we have made a short video below.


Magazines are a treat for my boys and little man enjoyed this Paw Patrol one. 

Do you have a Paw Patrol fan? What activities do you like to see in children's magazines?


This is a commissioned post but all thoughts are our own.

Wednesday, 13 April 2016

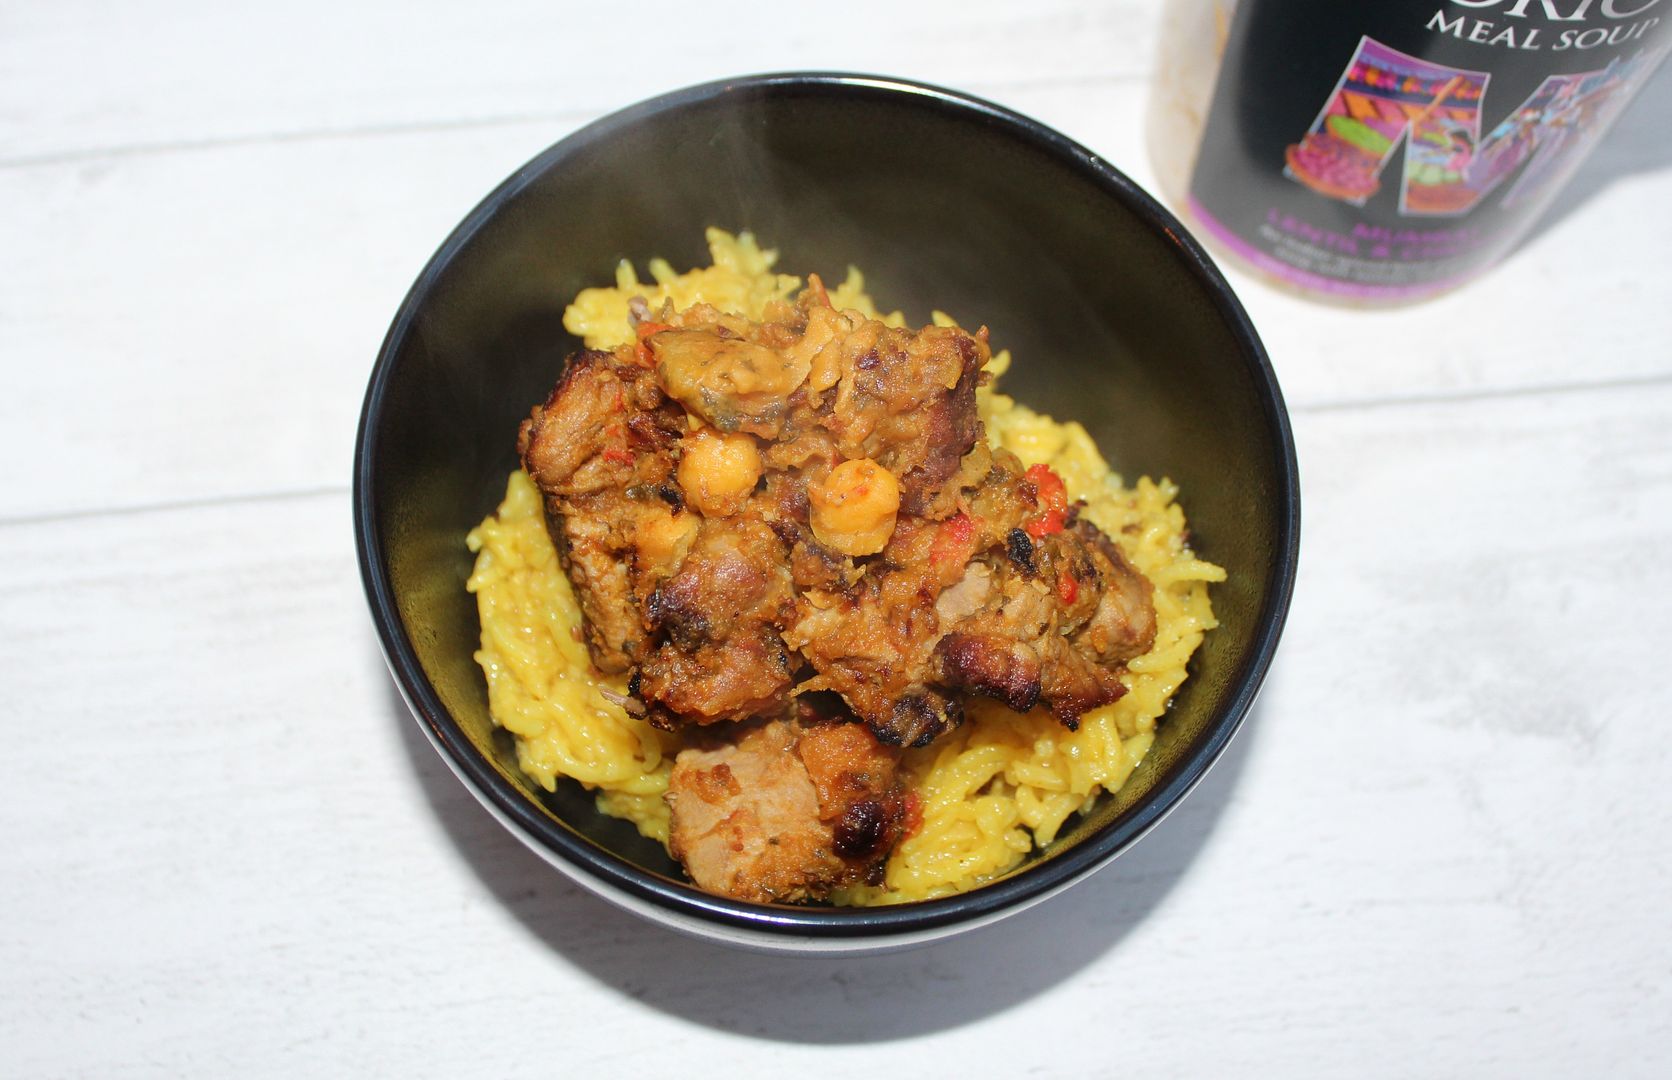
Fakeaway Lamb and Chickpea Curry


Regular readers will know that we have been experiencing taste adventures with Glorious Soup over the last six months. Without a shadow of a doubt my favourite in the range is the lentil and chickpea meal soup. It is packed full of flavour and makes a tasty lunch.

Whilst I haven't been to Mumbai, when we were on honeymoon in Hong Kong we went for a curry. It was a very different experience than in the UK. There were no creamy dishes like we are used to but lots of flavour. Reminiscing gave me the idea of using the Mumbai soup as the base to a curry. My husband and I like to enjoy a curry on a Friday evening, but the last thing I want to do at the end of the week is spend a few hows in the kitchen. Well with this recipe, just a little preparation makes a delicious curry that tastes even better than the takeaway and is much healthier too.


As my children aren't up to eating curry yet, this recipe serves two people.

For the curry:

500g lamb shoulder diced
1tsp chopped garlic
1tsp chopped ginger
1tsp coconut oil
A pot of Glorious Mumbai Lentil and Chickpea Soup
2tbsp water

For the rice:

1tsp coconut oil
175g basmati rice
1tbsp tumeric
1tsp fennel seeds
2 bay leaves
1 cinnamon stick
4 cardamon pods
4 cloves
water


The night before, dice the lamb and leave to marinate with the garlic and ginger.

Heat the coconut oil in a pan and brown the meat. Place in an oven proof dish and add the soup and water. Cover with foil and cook at 200C for 1hr 20 mins. Then stir and remove the foil and cook for a further 40 minutes.

To make the pilau rice, add the coconut oil to a saucepan and heat with the spices. Wash the rice and then add to the pan. Cover with water so it is about 2cm above the rice, Bring to the boil, then turn the heat down and add the lid. Cook for a further 15 minutes. Check the rice and add more water if necessary.


Perfect for a weekend meal which is less expensive and healthier than a takeaway. Do you have any great fakeaway recipes? What is your favourite Glorious soup?


This is a commissioned post

Tuesday, 12 April 2016

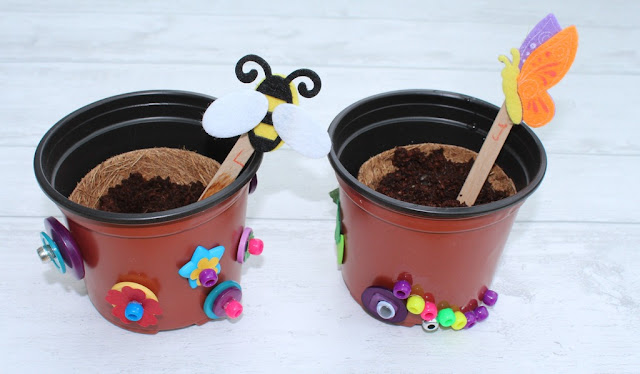
Button and Bead Flowerpots #BostikBloggers

button and bead flower pots


Our Bostik Bloggers box arrived this month full of garden themed items. As we had some sunflowers to plant we decided to decorate some plant pots. To make these you will need some lollipop sticks (to label what you have planted/whose pot it is) Some plant pots, a variety of beads, buttons and foan shapes, Glu dots and some seeds.

This is the first time I have used glu dots and I have to say they are fantastic! I have a glue gun which I absolutely love, however, I don't use it with the children due to the heat. Imagine the same kind of glue as you get from a glue gun, but in dots and not hot and you have glu dots. They are absolutely perfect for sticking buttons and beads onto a plant pot. Even better is that there is no mess!

For my plant pot, I used buttons and beads stuck using glu dots to make flowers.

Little man started using white glu, before trying the glu dots and he made a caterpillar with the beads.

We then added foam shapes to our lollipop sticks and wrote our names on them. When then planted our sunflower seeds and shall keep them in the conservatory until they are big enough to be planted in the garden.

Let the sunflower competition commence!

Do you have a sunflower growing competition in your family?


Wednesday, 6 April 2016

Walnut Cake Using Coconut Oil


I wont lie, I was a little dubious about cooking with Vita Coco coconut oil for the first time. The main reason for this is that it told me that not only could I eat it, I could use it in the bathroom as a make up remover! These are normally two totally different kinds of products for me. However, this highlights the versatility of the product and that it is 100% organic. It really is the first ingredient that I have tried in a long time that I am really excited about trying more. I have used it to cook meat and it is perfect for making a curry. The flavour of coconut is always there but not too over powering. 

I decided to make a walnut cake using the coconut oil. instead of Trex. Coconut oil is a healthier type of fat (as opposed to butter) so I am all for making my treats a little bit better for me. I felt it worked really well and I really liked making the icing with it. Another bonus to this is that the icing stays white.

This recipe is for a 5 inch cake tin, so double if you have an 8 inch tin.

Ingredients:

1 1/2 oz coconut oil
1oz caster sugar
1 egg
1 3/4oz self raising flour
2 oz walnuts
1/4 tsp baking powder

For the icing

1 tbsp cocount oil
4 tbsp icing sugar
A splash of water

Pre heat the oven to 180C

Place the walnuts in a blender and grind to a fine powder.
Mix all the cake ingredients together and whisk to a light batter.

Divide the mixture between two 5 inch cake tins which have been lined with baking parchment and greased with coconut oil.

Bake for 20 minutes until a skewker comes out clean. Allow to cool.

Meanwhile mix the icing ingredients together. Spread inbetween the cakes and use to add some walnut halves on top for decoration.


Have you tried coconut oil before? What do you use it for?


This recipe is an entry into the #Swearbyit challenge with Vita Coco. Find more great coconut oil recipes and tips on using coconut oil at www.swearbyit.com